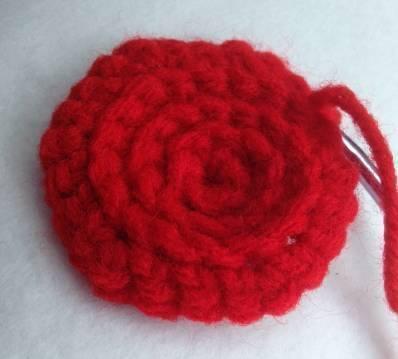
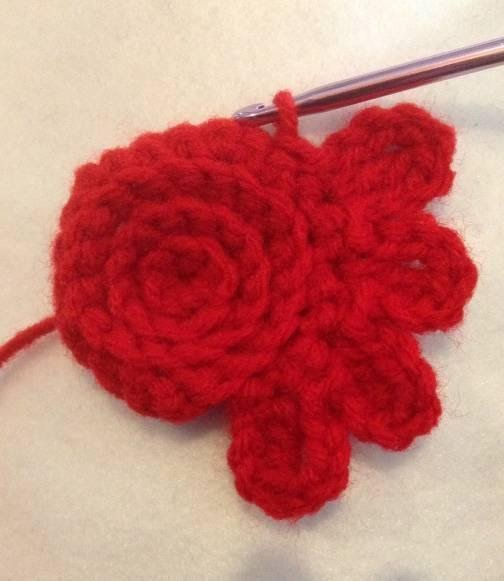
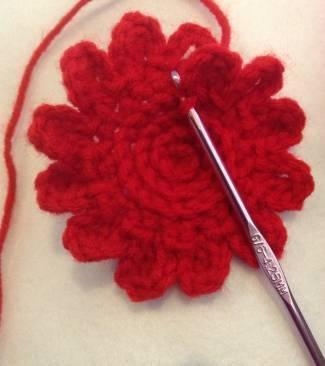
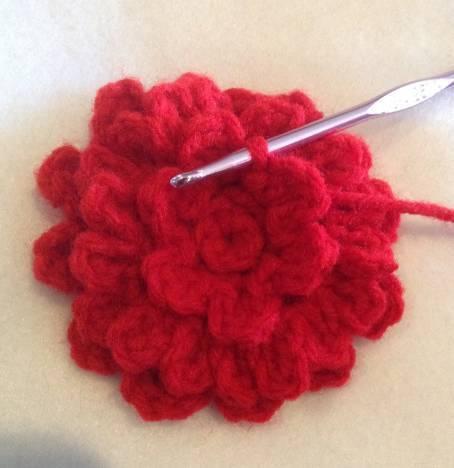
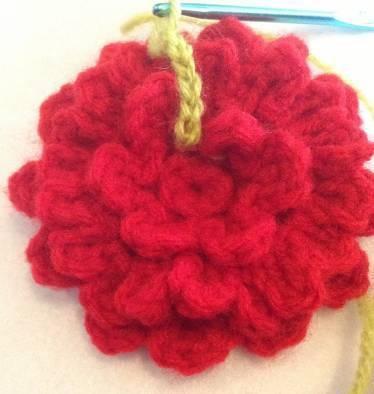
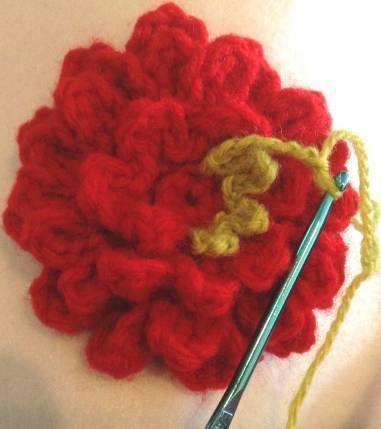
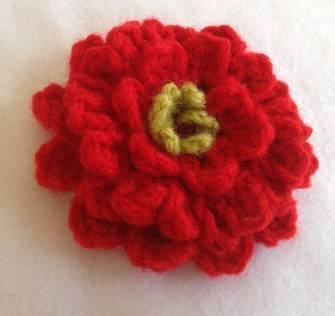
Showing posts with label free flower pattern. Show all posts

Wednesday, March 31, 2021

New Paperback Edition of Susan's Showy Flowers! Plus Free Flower pattern excerpted from the Book

 I am very pleased to announce the publication of my paperback edition of Susan's Showy Flowers on Amazon! 

This is the new collection of  my crochet patterns for 14 bold and chunky flowers that are great for all kinds of embellishment: put them on children's purses, baskets and toys; sew them onto scarves and sweaters. I love them, and love the little drawstring bag pattern that comes with the flowers. 
Here's where you can find it on Amazon! By the way, it's an eBook too on Amazon, in case you prefer that. 
___________________

Here's an excerpt from the book for my blog readers: it's the pattern for my New Mum II, which is a crazy, chunky, fun-to-crochet flower that I love. Lots of petals, whew, but when you're done it's so worth it!! Materials needed are at the beginning of the pattern.

Thanks for being my blog readers and have a wonderful day crocheting!

New Mum II - Crochet Pattern Instructions

C:\Users\Susan\Pictures\CrochetPhotos\MumII\DSCN1033.JPG


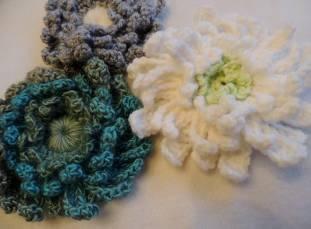
This full and showy chrysanthemum can be worked in any weight yarn with its suggested hook size; but I prefer a medium weight yarn and a size F or G for a nice tight stitch…or a light weight (baby weight) yarn with a size D or E hook. If you use a soft and flexible yarn, its petals will curl more, as in the blue and gray mums in the photo above. A more sturdy acrylic yarn will yield a flower with stiffer petals.


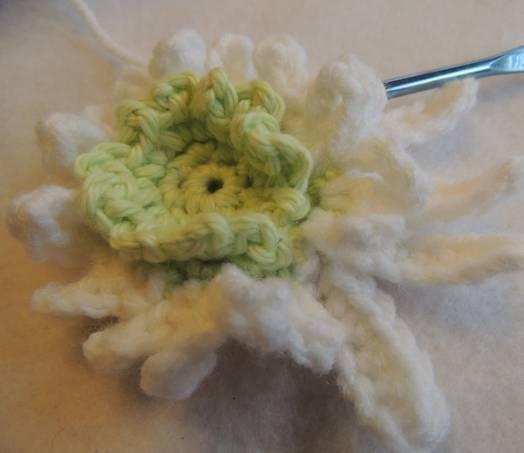
You can choose either a button style center (shown in the blue and grey example) or a nubby center of sc with small loops (shown in the white example)


Use two colors of yarn, one for the flower center, and one for the main color of your flower.


flowerdividerNoBackgrsm.JPG


In your first yarn color for your center, (I chose light green light weight yarns), make your flower center first, ending with a round of 18 stitches to build your mum petals on:


Button center:


Rnd 1: Ch 3, join to form small ring. Ch 2, dc 11 times in ring. Join.
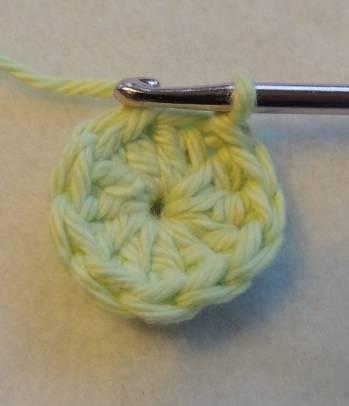
C:\Users\Susan\Pictures\CrochetPhotos\NewFlowers\DSCN1164.JPG


Rnd 2: Cover dcs of rnd 1 with 18 long single crochet stitches. (You can see a small tutorial if you search youtube for “VideoLongSingleCrochet”). Join. Skip to Rnd 5 to complete your mum.
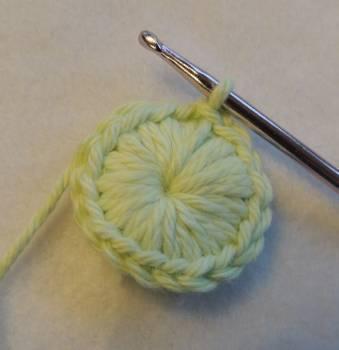

C:\Users\Susan\Pictures\CrochetPhotos\NewFlowers\DSCN1167.JPG


Alternate Nubby Center:


Rnd 1: Ch 1, tighten to form a small knot (this is optional, but it keeps your work from loosening), then ch 2; in 2nd ch from hook work a sc circle of 6 sc (see photo on next page) Do not join.
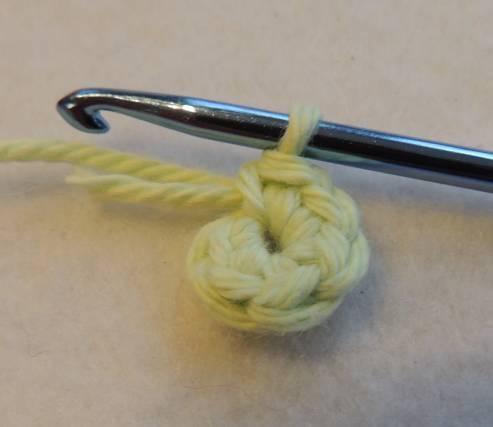
C:\Users\Susan\Pictures\CrochetPhotos\MumII\DSCN0978.JPG


Rnd 2: Work 2 sc in every sc: 12 sc.


Rnd 3: In FLO (front loops only), work *(sc, ch 3) in next sc, repeat from * around. (see photo on next page).


C:\Users\Susan\Pictures\CrochetPhotos\MumII\DSCN0989.JPG


You will still have the remaining 12 back loops on the reverse side on which you will continue your flower (see photo on next page).
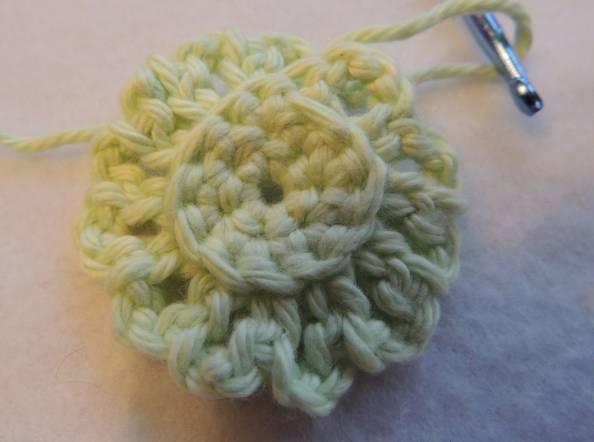
C:\Users\Susan\Pictures\CrochetPhotos\MumII\DSCN0992.JPG


Rnd 4: In remaining back loops on reverse side, work (sc, 2 sc) around for a circle of 18 sc. (see photo below).
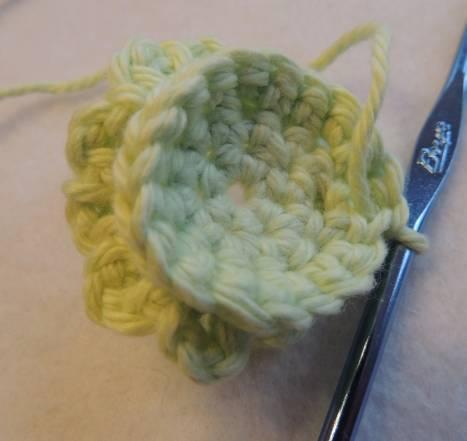

C:\Users\Susan\Pictures\CrochetPhotos\MumII\DSCN0993.JPG


Change to main color of your flower (White in my example). Attach to ending point of last round.


Rnd 5: In FLO (front loops only) of last rnd, work *( ch 6, sc in next st), repeat from * around. Do not join.
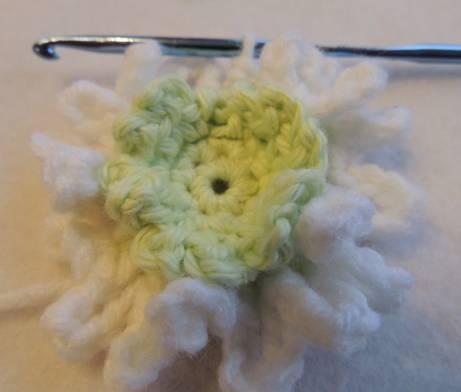

C:\Users\Susan\Pictures\CrochetPhotos\MumII\DSCN0996.JPG


Rnd 6: in remaining back loops from Rnd 4, work sc in every st. (see photo on next page)

Do not join.
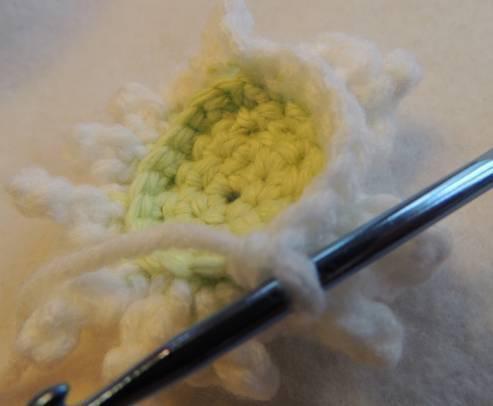
C:\Users\Susan\Pictures\CrochetPhotos\MumII\DSCN0998.JPG


You will now work in the front loops only of the sc stitches just formed.


Rnd 7: *Sc in FLO of next sc,Ch 6, skip 1st ch and sc in next 5 ch back to center, repeat from * around. (see photos below) Do not join,
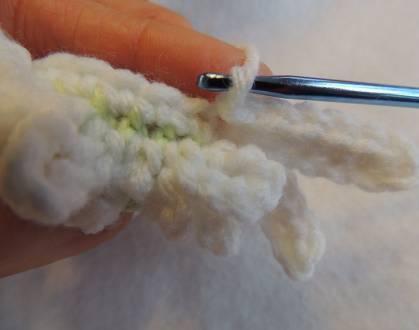

C:\Users\Susan\Pictures\CrochetPhotos\MumII\DSCN1000.JPG

Side view of round 7

C:\Users\Susan\Pictures\CrochetPhotos\MumII\DSCN0999.JPG

Front view of round 7- sc petals


Rnd 8: Again reach to back of flower and work next rnd in remaining back loops from Rnd 6:
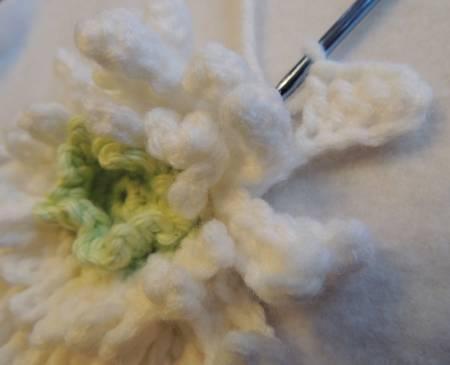


C:\Users\Susan\Pictures\CrochetPhotos\MumII\DSCN1002.JPG

Round 8 – dc petals

*Sc in next loop, Ch 8, skip 1st 2 ch, work dc in next 6 ch back to center, repeat from *around. See photo above. Join. Tie off and weave yarn end through the back of your work.

See how the back of your mum should look in the photo below).
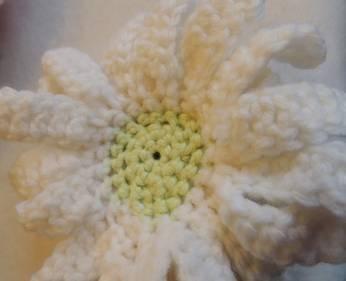

C:\Users\Susan\Pictures\CrochetPhotos\MumII\DSCN1006.JPG

(back view of mum)


And below see the finished Mum!
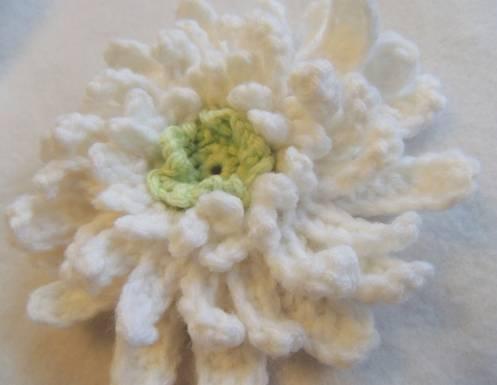


C:\Users\Susan\Pictures\CrochetPhotos\MumII\DSCN1011.JPG


flowerdividerNoBackgrsm.JPG

Thanks for looking! If you'd like to see more, you can find all of my Amazon ebooks on crochet here; and on Etsy, my patterns can be found at susanlinnstudio.etsy.com

Have fun and happy crocheting!

Susan


Monday, August 14, 2017

Crochet Flower and Fabric Scrap for a Gift Bag

I'm a crochet diva and sometimes even I forget that a  crocheted flower  makes a perfect bow! And wait...a scrap of fabric can simply be gathered up into a pouch and used - instead of a gift bag!


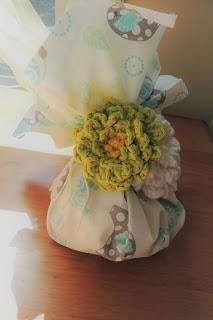
Put a flower on a pouch of fabric: instant gift bag!

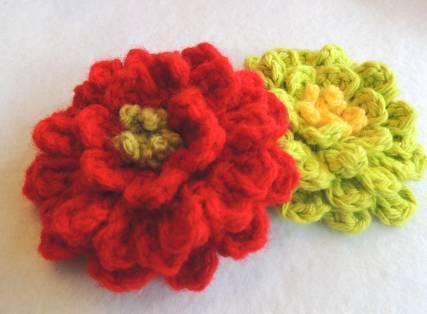
This is my Outside-In Zinnia pictured above, part of "Susan's Showy Flowers" crochet pattern collection.


Now don't get me wrong, I love gift bags because they are reusable. I think there might be some in our house which are as old as my youngest child and as wrinkled as her mom! They are fun, they are bright, they're nice and sturdy and HECK, they're so easy! Drop the awkward gift shape in them and you're done!


But if you happen to be a wanna-be hippie like me and would like to begin using up bits of yarn and fabric rather than run to the store, just cut out a piece of fabric large enough to enfold your gift, make a flower in 10 or 20 minutes (one of my newest flower pattern sets is linked below), and tie the flower onto the "neck" of your pouch with a piece of string.


Here is the pattern for the Zinnia crochet flower above. (It's an excerpt from the crochet pattern book I mention at the bottom of the post)


Susan's "From-the-Outside-In" One Piece Zinnia

C:\Users\Susan\AppData\Local\Microsoft\Windows\INetCache\Content.Word\DSCN1199.jpg


The examples above are worked in a medium weight yarn for the main color, a lightweight yarn for the last few stitches of the flower center. Use a size G hook – for the medium weight yarn - and D hook – for the lightweight yarn.


flowerdividerNoBackgrsm.JPG


The nice thing about this zinnia (it ends up about 3" wide when worked in medium weight yarn) is that it's worked all in one piece, except for the center stamens if you decide to change color for them. It's super dense, the petals are beautiful and crowded, and it will stand up well to tough use on a child's hat or a basket or purse.

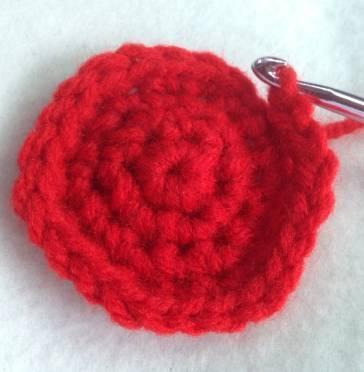
First, create a flat sc circle for your flower base: work in Front Loops Only!

Rnd 1 of base: Ch 2, work 6 sc in 2nd ch from hook. Continue working in the round in the same direction, no joining:


Rnd 2 of base: work 2 sc in FLO of every sc around, do not join: 12 sc circle


Rnd 3 of base: in FLO work (sc, 2 sc) around, do not join: 18 sc circle


Rnd 4 of base: in FLO work (sc, sc, 2 sc) around. (See photos below) Sl st in next st, and flip to reverse side of work

C:\Users\Susan\Pictures\CrochetPhotos\NewFlowers\IMG_4329.JPG

After Rnd 4


C:\Users\Susan\Pictures\CrochetPhotos\NewFlowers\IMG_4331.JPG

Flip to reverse side of work and notice the spiral of left-over loops into which you will work your next stitches.


First outer petal round is a round of tc petals in every other stitch: Ch 3, tc in 1st (outermost) sc of circle, ch 3, sl st in same sc, *skip next sc, sl st in next sc, (ch 3, tc, ch 3, sl st in same sc), repeat from * around the outermost sc's of the circle. (See photo below).


At the end of the round, you should have 12 petals. Do not turn (do not flip), or join,

but continue on in the same direction:


As you reach the point where the sc's spiral inward, insert your hook in the remaining back loop of the next sc of the base circle (see photo on next page)

C:\Users\Susan\Pictures\CrochetPhotos\NewFlowers\IMG_4340.JPG


Now you have finished the outer petals and will start spiraling inward, continuing to work in the round.

Work a round of dc petals in every loop: sl st, ch 2, dc in same loop, ch 2, sl st in same loop, *sl st in next loop, (ch 2, dc, ch 2, sl st in same loop), repeat from * for eighteen somewhat crowded dc petals. (This is one round around the center).

Next, a round of dc petals in every other loop: *skip next loop, sl st in next loop, (ch 2, dc, ch 2, sl st in same loop), repeat from * for six petals (one round). This should leave you 6 loops, close to the center.


In these rounds it is helpful to fold down the base disc so you can more easily work in these loops from the first rnd of the flower.

C:\Users\Susan\Pictures\CrochetPhotos\NewFlowers\IMG_4343.JPG


You will stop when you reach the last 6 loops of the inward spiral, change color to a lightweight white or pale green or yellow, (dmc embroidery floss is great for flower centers: I have used # 165). Also switch to a smaller D hook) and work as follows:


C:\Users\Susan\Pictures\CrochetPhotos\NewFlowers\IMG_4344.JPG


*(sl st, ch 7, sl st) in next loop, repeat from * 5 times, tie off.


C:\Users\Susan\Pictures\CrochetPhotos\NewFlowers\IMG_4346.JPG


Pull all,yarn or thread ends through to back of flower and weave through work.


C:\Users\Susan\Pictures\CrochetPhotos\NewFlowers\IMG_4353.JPG


flowerdividerNoBackgrsm.JPG


 If you're interested, my Amazon Kindle eBook "Susan's Shower Flowers"  of my best crochet flower patterns - including this one -  is live now and also Susan's Showy Flowers is on Etsy as an eBook in pdf form. ALSO, I'm so excited that it's available now as a 117-page 8"x10" full color paperback on Amazon as well. By the way, thank you for considering support of my design work by buying this crochet pattern book.😍


You can see all of my crochet eBook patterns here:

www.susanlinnstudio.etsy.com


https://www.amazon.com/Susan-Kennedy/e/B00O07W7MS/ref=ntt_dp_epwbk_0


Thanks for looking and happy crocheting!


Susan


Monday, February 2, 2015

Updated Granny Hat, and a new Free Flower crochet pattern in this blog post

I just updated my easiest and (to me) cutest hat to have a cover picture in more current colors AND to add this cool little flower which is faster, cuter, and easier than in the unrevised pattern!! I'm so proud, it's "Susan's Loopy Flower" and if you want the pattern for free, you can find it here.


And if you'd like to see the revised Granny Hat pattern, complete with three sizes and both flower patterns, you can find it on etsy and also on Amazon. 

I'm also working on a great big Chrysanthemum revision which is also easier and just plain old better...so I hope you see it soon, and enjoy it! 

Thanks you guys, and check out all of my original patterns in my Etsy Store
 Susan


Wednesday, November 28, 2012

How to Weave a Scarf, Free Scarf Flower Pattern And Coupon For my Etsy Patterns!

Crocheting Friends, I've been maniacally working up new patterns! I have halfway written patterns for nature-based scarves, a very cool ruffled flower (see the photo above) which I'll give you the pattern for below, two horse appliques and a camel applique which was just a failed horse attempt, ha!! You can check out my new "Muscadine" scarf pattern which would work well with the "Woven Tie" treatment I'm going to show you below, AND type in "WINTER2012" at checkout at my My Etsy Crochet Pattern Store to get 16% off of any of your pattern purchases for all of those gifts you're making! I chose 16% because 15% sounded cheap, so there you have it.

I've been enjoying "Impeccable" yarn by Loops and Threads. It has such a nice feel, and you can fly when you work with it. It just wants to cooperate! You know what I mean. Kindof like wool feels, but that wonderful-to-work-with wool hates my skin, and my skin hates it. One of these nature based scarf patterns is worked in a grey in the "Impeccable" Line, you can see how it looks when it's all woven in that cool pinterest way (check out the photo below)


The first step in tying a winter scarf in this doubled over "Woven Tie" method is to fold your scarf in half and lay it across your neck, with the ends on one side, and the folded over loop on the other side (see below)
The next step is to draw only one of the ends through the loop which is opposite it.
(see below)
The third step is to stretch that loop part down so you can insert your hand and twist it halfway around
(see below)

And the last step is to reach across, grab the other end of your scarf, and draw it through the now twisted loop (see below).

You end up with a nicely woven neckwarmer, it has some interest and flair! Of course, I can't let it alone and have to top it off with a flower tie, (below) which I'll tell you how to make if you scroll down. 

You can do this "Woven Tie" treatment with any reasonably long scarf, and you can add the flower which is detailed below. BUT if you want the pattern for this ruffly-twisty-seaweedy scarf which I am calling my "Davy Jones" scarf because it's so macabre and creepy....you'll have to wait until I write it up! It's supposed to look like something Davy Jones in Pirates of the Caribbean would have worn, and it's also supposed to look like a natural form, maybe even a little like freeform crochet. But with a pattern.

So here's how to make this ruffly, thick flower, which you top off with two chained ends so it becomes a scarf tie (again, you'll have to get the pattern when I put it in my store, if you want step by step photos and a diagram):

Ruffled Davy Jones Flower
Start with a chain 3 and a join to form a small ring. This makes a tiny circle which will give you a little more working room, which is needed for the long double crochets. (here's a youtube video showing you a long double crochet stitch)
Rnd 1: Chain 2 and work a circle of 12 dc in the small ring just formed. Join.
Rnd 2: Work 18 long double crochet stitches, working completely over the 12 dc, inserting your hook into the center of the circle. Join.
Rnd 3: Ch 1 and work *(3 sc in next st, 3 dc in next st) around the circle, inserting your hook into the round below once again, which forms the distinctive holes in this flower. Join.
Either make your flower into a pin by sewing it to a pin back, or attach two lengths of 45 chains to either side of the flower to make it into a tie which can encircle a scarf and give it a floppy, flowery point of interest. 
Enjoy!!

If you would like the formal pattern for this flower or for its matching scarf, I'll hopefully have them written up and available soon.

To see more of my original crochet design work, check out my Etsy Pattern Store or my Kindle- and Nook-friendly patterns on Amazon  or Barnes and Noble

Have a super crafty Christmas and thanks for checking out my blog!


Wednesday, May 9, 2012

Free Crochet Pattern - Rosy Baby Hat in NB and Preemie

I've made my little "Rosy Baby Hat" available here for free for a limited time! You get both the instructions for the tiny hat AND the simply swirly rose which goes with it. I love pairing that rose with scarfettes and small purses, it's a fun one. Worked all in one piece, too. BTW, use coupon code "MAYHALFOFF" on Etsy on May 17 and 18 for 50% off all of my crochet patterns!

It's so simple and easy, and comes in Preemie and Newborn sizes, tiny! Click here to get the pdf "Rosy Baby Hat" .
Work it in thread crochet instead of yarn for summer!! It's been super to have so much fun designing and writing, I'm sure I'll burn out in a little while and have to take a break, but it seems like the muse stays for a week or so.

You can see all of my patterns at My Etsy Store or, better yet, get them instantly as downloads from My Ravelry Pattern Store . For those of you who haven't seen much of my work, I'm all about flowers, leaves, animal appliques, anything small and commitment-free! One big purpose for my crochet is to calm my itchy hands, and if it's too big a project, forget it! So do check out my things and have a super time with your project bag this summer! If you're lucky enough to go to the beach, I know you'll have a bag full of tangled yarns, threads, and hooks with you, right by your feet. Ha!

Ravelry fans, use the link above and type in the coupon code "THANK YOU" for a buy two, get one free deal.


Toodles!